✅ Getting Started
We have numerous guides and recommendations on this website. You are free to explore and take what you find most helpful. However, if you're looking for more guidance on how to bring together SLIM's recommendations for your project in an aggregated form, you've come to the right place.
Checklist
Here we present a checklist you can run through for your project, as well as links to automation / guides to make your project ready with the best of SLIM.
Review your project's repositories, and ensure all have the following (in prioritized order):
| Checklist Item | Why? |
|---|---|
| ✅ LICENSE | Spell out legal terms for software usage & modification |
| ✅ README | Provide project overview, setup, & usage instructions |
| ✅ Contributing Guide | Outline how to contribute & the process for submissions |
| ✅ Code of Conduct | Establish community behavior standards |
| ✅ Issue Templates | Streamline issue reporting for consistency & clarity |
| ✅ Pull Request Templates | Ensure PRs are comprehensive & adhere to project standards |
| ✅ Documentation | Offer detailed info on features, APIs, & customizations not covered in README |
| ✅ Change Log | Keep track of all notable changes in each version in a human-readable format |
| ✅ Security & Dependency Scanning | Identify vulnerabilities & outdated dependencies for security |
| ✅ Sensitive Information Scanning | Detect accidental commits of sensitive info |
| ✅ Governance Model | Define decision-making structure & project leadership for transparency & organization |
| ✅ Software Metrics | Collect metrics on performance of your software's governance and lifecycle |
Repository Starter Kit
If you're starting a new project / repository, you can automatically get many of the above set up quickly using our:
There's two ways to use the Repository Starter Kit:
Using our Template Repository
- Navigate to the Starter Kit: Go to the SLIM Repository Starter Kit on GitHub.
- Create Your Repository: Click the "Use this template" button at the top right of the GitHub repository page.
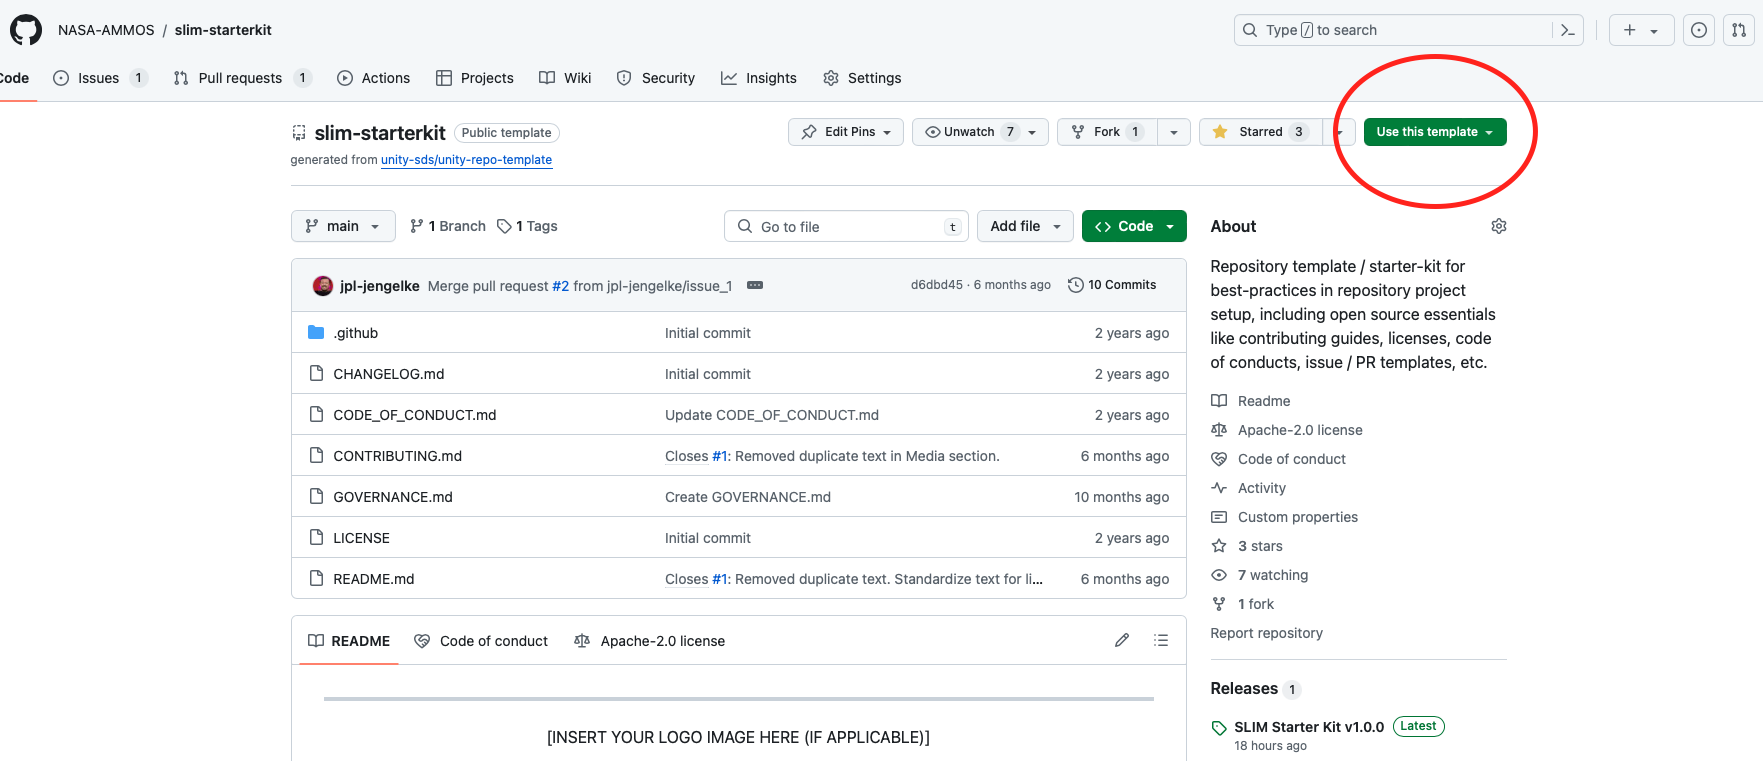 Example screenshot of button to click.
 - Set Up Your New Repository: Fill in the Repository name and description for your new project. Decide whether your repository will be public or private. Click "Create repository from template".
- Customize Your Repository: After creation, go through your new repository and look for files containing the
[INSERT ...]text. These are placeholders for you to replace with information specific to your project. This includes project name, description, contributing guidelines, etc. - Push Changes: Once you've made your customizations, commit and push the changes to your repository to ensure all your project information is up to date.
Manually Cloning and Using the Template
If you prefer to set up your project manually or need more control over the initial setup, follow these steps:
Clone the Starter Kit:
- Open your terminal or command prompt.
- Navigate to the directory where you want your project to be.
- Clone the repository using:
git clone https://github.com/nasa-ammos/slim-starterkit.git YOUR_PROJECT_NAME - Replace
YOUR_PROJECT_NAMEwith the desired name of your project folder.
Navigate to Your Project Directory:
cd YOUR_PROJECT_NAMERemove the Git History and start fresh:
rm -rf .git
git init
Customize Your Project: Go through the cloned files and modify any
[INSERT ...]placeholders with information relevant to your project. This step is crucial for tailoring the starter kit to your specific project needs.Initial Commit:
- Add all the files to your new git repository:
git add . - Commit the changes:
git commit -m "Initial commit with SLIM Repository Starter Kit"
- Add all the files to your new git repository:
Create a New Repository on GitHub (or your preferred Git hosting service) without initializing it with a README, .gitignore, or license since your project already contains these files.
Link Your Local Repository to GitHub:
- Follow the instructions provided by GitHub to push an existing repository from the command line, which will include:
git remote add origin <repository-URL>
git branch -M main
git push -u origin main
- Follow the instructions provided by GitHub to push an existing repository from the command line, which will include:
Push Your Changes: Ensure all your customizations and initial setup are pushed to your remote repository.
By following these steps, you'll have a new project set up with best practices in repository setup, including a LICENSE, README, contributing guide, and more. Remember to keep your project information up to date and regularly review the repository for any updates to the starter kit that might be beneficial to your project.